OpenStack is an open source cloud software which provides infrastructure-as-a-service (IaaS). It can be installed on single and multiple nodes.
In this article we will deploy openStack on three nodes ( compute + controller + network ) on CentOS 7.x using RDO repository and packstack utility. For Single Node OpenStack Installation refer the below :
How to Install Single Node OpenStack on CentOS 7
In article i am using three virtual machines hosted on VirtualBox and each VM has a single LAN interface. Below are architecture details :
Controller Node Details :
- Hostname = controller.example.com
- IP Address = 192.168.1.30
- OS = CentOS 7.x
- DNS = 192.168.1.11
Following OpenStack Components will installed on controller node :
- Keystone
- Glance
- swift
- Cinder
- Horizon
- Neutron
- Nova novncproxy
- Novnc
- Nova api
- Nova Scheduler
- Nova-conductor
Compute Node Details :
- Hostname = compute.example.com
- IP Address = 192.168.1.31
- OS = CentOS 7.X
- DNS = 192.168.1.11
Following OpenStack Components will installed on compute node :
- Nova Compute
- Neutron – Openvswitch Agent
Network Node Details :
- Hostname = network.example.com
- IP Address = 192.168.1.32
- OS = CentOS 7.x
- DNS = 192.168.1.11
Following OpenStack Components will installed on network node :
- Neutron Server
- Neturon DHCP agent
- Neutron- Openswitch agent
- Neutron L3 agent
Perform the Following Steps for Installation :
Step:1 Update the nodes using below command.
Use the below command on all three nodes to update all installed packages.
# yum -y update ; reboot
Step:2 Update /etc/hosts file and Hostname
Set the hostname on all the three nodes using below command , in case it is not set.
# hostnamectl set-hostname 'new_hostname'
Update the /etc/hosts file if you don’t have your local DNS configured.
192.168.1.30 controller.example.com controller
192.168.1.31 compute.example.com    compute
192.168.1.32 network.example.com    network
Step:3 Disable SELinux and Network Manager on all three nodes.
Use below command to disable SELinux on all three nodes.
# setenforce 0
Disabled SELinux permanently by the changing the parameter ‘SELINUX=disabled’ in the file ‘/etc/sysconfig/selinux‘
Use below commands to disable Network Manager on all three nodes.
# systemctl stop NetworkManager
# systemctl disable NetworkManager
# reboot
Step:4 Set Passwordless authentication from Controller node to Compute & Network Node.
Run the below commands from Controller node.
[root@controller ~]# ssh-keygen
[root@controller ~]# ssh-copy-id -i /root/.ssh/id_rsa.pub [email protected]
[root@controller ~]# ssh-copy-id -i /root/.ssh/id_rsa.pub [email protected]
Now check :
[root@controller ~]# ssh compute
Last login: Sun Apr 3 00:03:44 2016 from controller.example.com
[root@compute ~]# hostname
compute.example.com
[root@compute ~]#

[root@controller ~]# ssh network
Last login: Sun Apr 3 00:04:20 2016 from controller.example.com
[root@network ~]# hostname
network.example.com
[root@network ~]#
Step:5 Enable RDO repository and install packstack utility
Use below yum command to enable RDO repository and install packstack utility only on controller node.
[root@controller ~]# yum install -y https://www.rdoproject.org/repos/rdo-release.rpm
[root@controller ~]# yum install -y openstack-packstack
Step:6 Generate and customize answer file
Use below command to generate answer file.
[root@controller ~]# packstack --gen-answer-file=/root/answer.txt
[root@controller ~]#
Edit the answer file and Specify the ip address of controller, compute and network node. Apart from this also specify the passwords of different services and disable the components like Demo version and Ceilometer.
[root@controller ~]# vi /root/answer.txt
........................................
CONFIG_CONTROLLER_HOST=192.168.1.30
CONFIG_COMPUTE_HOSTS=192.168.1.31
CONFIG_NETWORK_HOSTS=192.168.1.32
CONFIG_PROVISION_DEMO=n
CONFIG_CEILOMETER_INSTALL=n
CONFIG_HORIZON_SSL=y
CONFIG_NTP_SERVERS=<Specify NTP Server IP >
CONFIG_KEYSTONE_ADMIN_PW=<Specify New_Password>
..........................................
Note : In case if you have don’t NTP server then you can leave NTP parameter as it is, but it is highly recommended that we should use ntp server for time syncing.
Step:7 Start Installation using packstack command.
Now we are good to start the openstack installation using packstack command. Run the below command from Controller node.
[root@controller ~]# packstack --answer-file=/root/answer.txt
Once the installation is completed successfully we will get below:

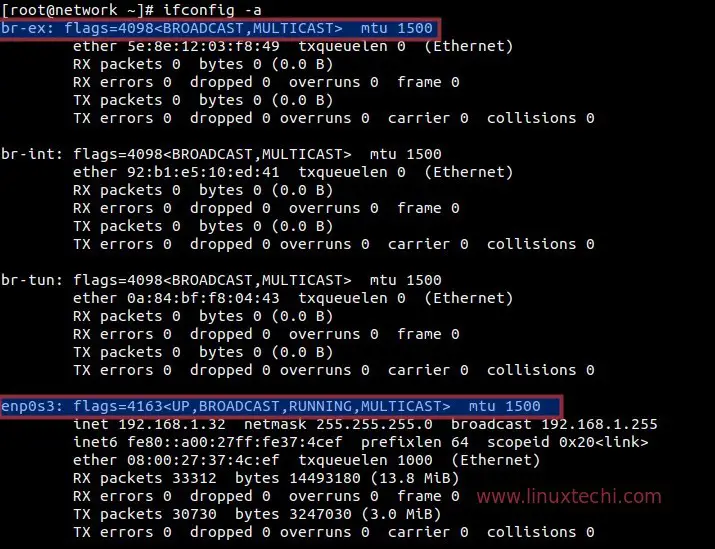
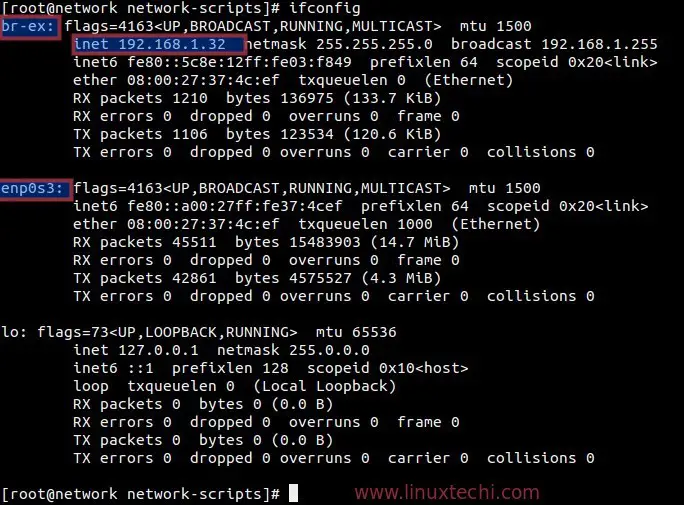
After the installation, a new interface ‘br-ex‘ will created in the network node. Add network interface (enp0s3 or eth0 or may be other name ) to the Open vSwitch ‘br-ex’ bridge as a port and assign the ip address of ‘ enp0s3’ to ‘ br-ex’

[root@network ~]# cd /etc/sysconfig/network-scripts/
[root@network network-scripts]# cp ifcfg-enp0s3 ifcfg-br-ex
[root@network network-scripts]# vi ifcfg-enp0s3
DEVICE=enp0s3
HWADDR=08:00:27:37:4C:EF
TYPE=OVSPort
DEVICETYPE=ovs
OVS_BRIDGE=br-ex
ONBOOT=yes

[root@network network-scripts]# vi ifcfg-br-ex
DEVICE=br-ex
DEVICETYPE=ovs
TYPE=OVSBridge
BOOTPROTO=static
IPADDR=192.168.1.32
NETMASK=255.255.255.0
GATEWAY=192.168.1.1
DNS1=192.168.1.11
ONBOOT=yes
Restart the Network service using below command.
[root@network network-scripts]# systemctl restart network
[root@network network-scripts]#

Step:8 Access Openstack Dashboard.
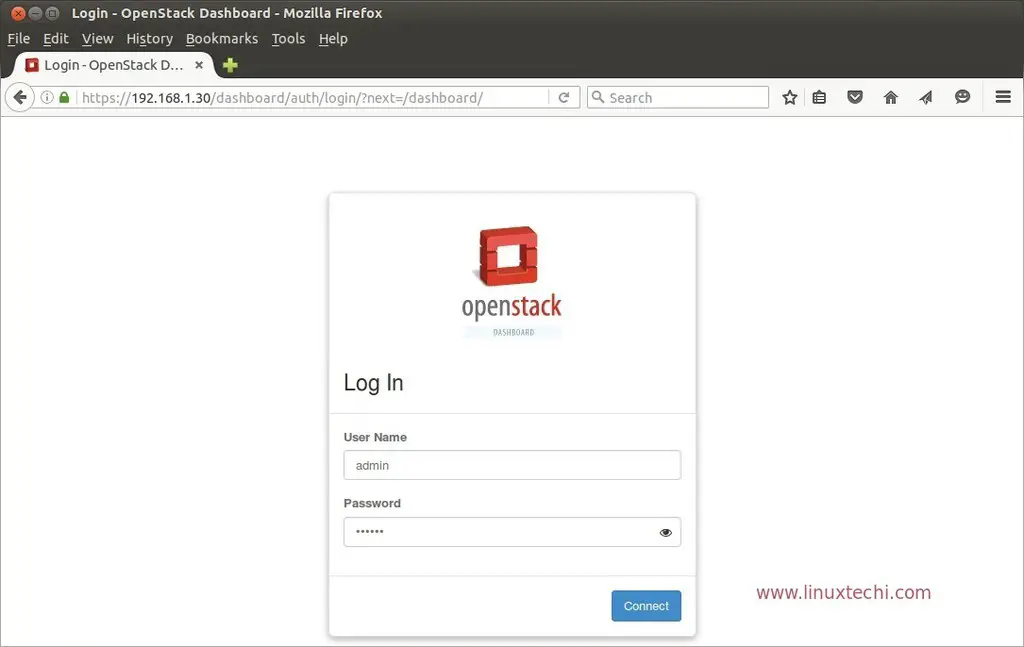
Now try to access the openstack dashboard from the browser using below.
https://192.168.1.30/dashboard
Use user name as ‘admin’ and password that you specify in the answer.txt file.
Click on ‘Connect’
Note : In case you are getting ‘Error: Unable to retrieve volume limit information’ in the dashboard, this can be fixed by adding the following in the cinder.conf file on the controller node.
[root@controller ~]# vi /etc/cinder/cinder.conf
....................................
[keystone_authtoken]
auth_uri = http://<Controller_IP>:5000
auth_url = http://<Controller_IP>:35357
auth_plugin = password
project_domain_id = default
user_domain_id = default
project_name = services
username = cinder
password = <Cinder_Password> {Search CONFIG_CINDER_KS_PW in answer file}
.....................................
Restart the Cinder Service.
[root@controller ~]# systemctl restart  openstack-cinder-api.service
[root@controller ~]# systemctl restart  openstack-cinder-backup.service
[root@controller ~]# systemctl restart  openstack-cinder-scheduler.service
[root@controller ~]# systemctl restart  openstack-cinder-volume.service
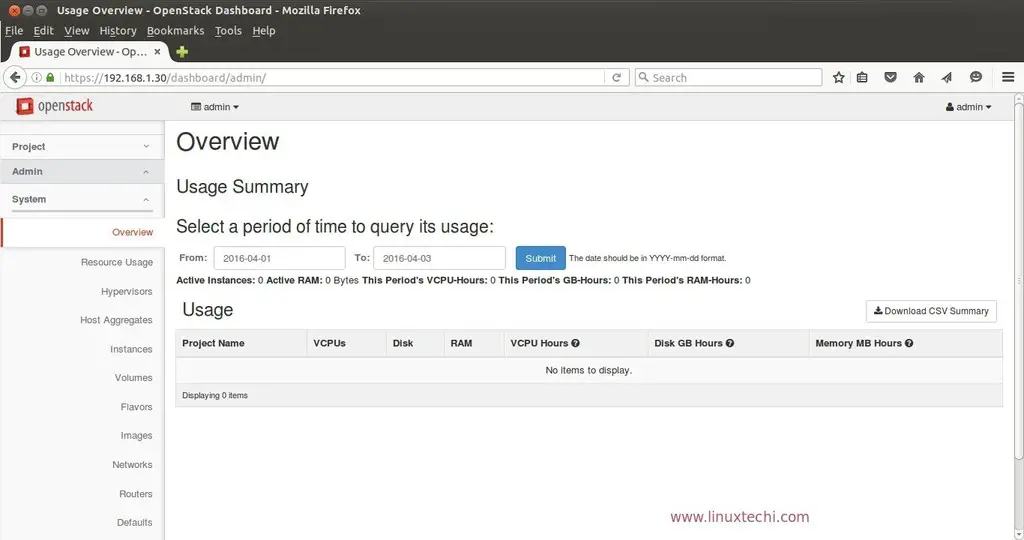
As we are able to login in the dashboard, so we can say that Installation part is completed. Now the next task is to launch an instance, for that we need to perform following tasks .
- Create Project and Users
- Assign Users to the Project.
- Create image and flavors
- Define Internal and external network
- Create Router
- Create Security Rules for Virtual Machine or instance.
To accomplish above task refer the below URL :
Reference : – https://www.rdoproject.org/install/packstack/


Nice blog I have installed 3 node with out any issues.
Few questions.
object storage is —containers ?
Block storage is — Volumes?
Thanks Mani for the comments. Below is the answer to your question:
Object storage – Swift Service provides the object storage, yes containers are object storage
Block Storage – Cinder Service provide block storage, yes volumes are block storage
Hi, Could you please let me know why after restart 3 node I cant open the dashboard.
All the 3 node have internet connection and reachable from one another.
[root@network ~]# ifconfig
br-ex: flags=4163 mtu 1500
inet 192.168.0.130 netmask 255.255.255.0 broadcast 192.168.0.255
inet6 fe80::a00:27ff:fecf:c042 prefixlen 64 scopeid 0x20
ether 08:00:27:cf:c0:42 txqueuelen 0 (Ethernet)
RX packets 3614 bytes 293226 (286.3 KiB)
RX errors 0 dropped 0 overruns 0 frame 0
TX packets 3369 bytes 280514 (273.9 KiB)
TX errors 0 dropped 0 overruns 0 carrier 0 collisions 0
enp0s3: flags=4163 mtu 1500
inet6 fe80::a00:27ff:fecf:c042 prefixlen 64 scopeid 0x20
ether 08:00:27:cf:c0:42 txqueuelen 1000 (Ethernet)
RX packets 11537 bytes 1609837 (1.5 MiB)
RX errors 0 dropped 0 overruns 0 frame 0
TX packets 3370 bytes 293443 (286.5 KiB)
TX errors 0 dropped 0 overruns 0 carrier 0 collisions 0
lo: flags=73 mtu 65536
inet 127.0.0.1 netmask 255.0.0.0
inet6 ::1 prefixlen 128 scopeid 0x10
loop txqueuelen 0 (Local Loopback)
RX packets 2 bytes 190 (190.0 B)
RX errors 0 dropped 0 overruns 0 frame 0
TX packets 2 bytes 190 (190.0 B)
TX errors 0 dropped 0 overruns 0 carrier 0 collisions 0
virbr0: flags=4099 mtu 1500
inet 192.168.122.1 netmask 255.255.255.0 broadcast 192.168.122.255
ether 52:54:00:73:4b:e7 txqueuelen 0 (Ethernet)
RX packets 0 bytes 0 (0.0 B)
RX errors 0 dropped 0 overruns 0 frame 0
TX packets 0 bytes 0 (0.0 B)
TX errors 0 dropped 0 overruns 0 carrier 0 collisions 0
[root@network ~]#
Sourav , Check whether openstack services are running on each node or not.
# openstack-status
will this method work fine if i install these components (Controller, Compute, Network) on bare-metal hosts (Physical servers) instead of virtual machines? Will there be any changes required for this?
Aun ,
Same steps will work for the physical servers as well. You should think over the ML2 network drivers type depending on your setup and update the same in the answer file.
I have different managment network(on nic1) and external network(nic2) for multinode openstack deployment. what is the procedure I need to follow.
Controller Node: nic1 Manament
nic2 External
Compute Node: nic1 Manament
nic2 External
AJ ,
Ideally you should have three nics, nic1 for management, nic2 for vmdata and nic3 for external.
Thanks for your reply, If I have 3 nics is the procedure is same as above? do I need to give the external CIDR in answer file?
Yes Procedure will be same, in the answer file you need to specify Controller, Compute and Network IP . You can use mgmt VLAN(nic1) for these nodes and vmdata VLAN (nic2)for tunneling.
There is no need to specify external CIDR in the answer file.
Hello, Mr Pradeep
Here I’m confused how to edit answer file when using 3 NIC every node and how to configure br-ex NIC ? Basically I deploy physical environment as like bare-metal and deploy its for production.
And i have a another question How to add another node its compute node with my existing Openstack Platform?
If its possible please give me or publish a post on this Blogs site on this topics.
Many Many Thank you for your valueable blogs.
Hi ,
If I want to have more than 1 compute nodes then how can I do this ? What all changes I need to do in answer file ?
In the answer file you have to mentioned ip address of computes nodes separated by comma like below :
CONFIG_COMPUTE_HOSTS=192.168.1.31,192.168.1.51,192.168.1.151
If you want to add additional compute nodes after the installation then you need to edit answer file and update the below parameters.
EXCLUDE_SERVERS=’ip_address_of_servers_on -Which_installation_has_been_already_done’
CONFIG_COMPUTE_HOSTS=’ip_address_of_new_compute_node’
Once you are done with changes , re-run the packstack command with updated answer file.
This concept clean and understand good.
but any changes on networking part? or others?
Thank You
I wanted to use 2 NICs (eth0 – Floating IP network and eth1 – Openstack internal network) using vxlan, what will be the changes in the answers file? Thanks.
followed your instruction and it was going good until just after the begin of installation. preparing servers, i got error and every thing was in red color update and failed. do you know any point where to fix the issue
hi, i tried hard and overcome most of the issues but now when i turn off the network manager my connectivity is no longer there with the network. all three nodes are not connected each other anymore please need some help.
Hi Ahmad ,
Network Manager needs to be stop and disable before starting the installation. Also make sure firewalld service is disabled. If still you are unable to install Openstack, please do let me know i will help you.
hi kumar thanks for your reply, i gave it a go many times and at the end succeed to installed open stack but can to ping the instance. still understanding the technology, still working on it.
can you please let me know how to configure multi pal NICs and create the tunnel between compute and network node please.
i would like to configure one Management network and other external network. in external network all the instances will be connected outside world. and also i have a router placed to my running VM network. i have to able to communicate with the VM instance to Openstack instances.
i can upload a picture of my design. if i may
Hi,
Can I use packstack install multiple controllers for redundancy instead of one? Thanks.
Hi Johnson ,
You can install multiple controllers using packstack but it will not be in redundancy, For redundancy and high availability we have to manually configure pacemaker software or may be load balancer
Hey
This is Awesome tutorial …………..thanks ……I have an issue ………please guide me in following:
I have the following nodes:
Controller Node
Network Node
Compute Node 1
Compute Node 2
Please note that I have added “compute node 2” after installing 3 Node Openstack. I am able to successfully launch Instances on both of the compute node but the instance from compute node 1 is able to get an IP from my tenant network and able to ping outside……..but my compute node 2 instance is not getting IP Address from my tenant private network. I am stuck here ……please help me on it.
I want to know what compute node host networking I need to do on compute node 2 like ovs port and ovs bridge.
Waiting for your response ………..thanks in advance ……………:)
hi can you please send me you network configuration. and hardware config as well please
hi, I wonder why this error occurred?
ERROR : [Errno 2] No such file or directory: ‘/etc/pki/tls/certs/selfcert.crt’
Hi,
Thanks for the great article. Could you please share the Virtual machines interface details for all the nodes. I guess I am missing something there.
Thanks
Can you use packstack with bonding interfaces and dot1q tagging?
Hi, really nice steps but I need to deploy pivotal cloud foundry on openstack can you help me
Hi I have done the all steps and it gto success with done but after that i am unable to access dashboard on browser.. it throws the below error.
Not Found
The requested URL /dashboard was not found on this server.
Hi,
Could you please tell what is the mode of Network adapter you choose in virtualbox settings ? is that NAT or Bridged adapter or host only ? if it is host only adapter how you managed to communicate with external network ? please clarify thanks
Nice Post, its really helps me.
I have completed installation after two weeks.
Dashboard is not working. (Only one time it worked.)
the keystone file and answer file missed in home directory!!.
When I login to the dashboard. I get the bellow error.
“An error occurred authenticating. Please try again later.”
Also Does it suggestion to use this same packstack installation for productions. ?
Looking forward for your valuable reply.
Hi Gopinath,
It is recommended to use TripleO for Openstack deployment in Production Environment. Packstack is generally used for Openstack POC(Proof of Concept).
For Dashboard error, please make sure all the services of openstack are up and running, use the command ” openstack-service status” from the terminal to verify the openstack services.
Lots of thanks as its very nice article.
please help me I type “packstack –gen-answer-file = / root / answer.txt” it generates me an error “ERROR: Failed to load plugin from file ssl_001.py” what should I do? please help me.
which server has the dns with IP 192.168.1.11?
This is a separate Linux Machine on which Bind DNS server is configured.
Hi Team,
I had deployed All-in-one setup on Centos 8, is that possible if I can convert that same setup into this multi-node setup, if yes then could you please share the process with me.
Regards
it’s possible, you want to extend your existing All in One OpenStack Platform Right. You can add one or more compute node.
br-tun not created in my testing.
sorry sir, can you explain why this command not working in my VM ?
“yum install -y https://www.rdoproject.org/repos/rdo-release.rpm“